iGeoFun - What's fun around here?: Read QRCode with your phone.: "Ever wonder what the funny looking square barcodes are? They are QRCodes. Which directly link you to offers, web sites, coupons, ... without typing"
Wednesday, April 27, 2011
Monday, April 25, 2011
Domain Setup
GoDaddy.com
- Log in to your account at www.godaddy.com.
- Open the Domains tab and select My Domain Names. You'll be directed to the Domain Manager page.
- Click the domain that you'd like to use with your blog.
- Click the Total DNS Control And MX Records link at the bottom of the section entitled Total DNS.
- Click Add New CNAME Record in the box labelled CNAMES (aliases). If you've already created a CNAME record for your blog's address, click the pencil icon next to the existing CNAME record.
- For the Name, enter only the subdomain of the address you want to use for your blog. For example, if you picked
www.mydomain.comas your address, enterwwwhere. - Enter
ghs.google.comas the Host Name. Specify a TTL or use the default setting of 1 hour. - Click OK, and then click OK again.
- Find the control panel on your domain registrar’s website, and locate your DNS (Domain Name System) settings. In order to link your blog to your custom domain, follow the instructions below to enter your "CNAME" and "A-records."
CNAME
Where it says Name, simply enter "www" and list ghs.google.com as the Host Name. See our detailed instructions on providing CNAMEs for various registrars. If yours isn't listed, or if you run into other difficulties, contact your registrar directly and they can help you out.
A-records (optional)
The following action links your naked domain (example.com) to your actual site (www.example.com). If you skip this step, visitors who leave off the "www" will see an error page.
Enter your domain name in the format example.com, and list the I.P. addresses shown below in the "A" section. You'll need to create four separate A-records which point to four different Google IPs.
216.239.32.21
216.239.34.21
216.239.36.21
216.239.38.21 - Update your Blogger settings
Before you move onto this step, wait about an hour for your DNS settings to activate. If you attempt to change the publishing settings before the DNS changes activate, then we'll let you know with a warning message.
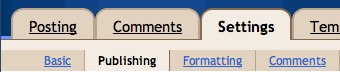
Now it’s time to make sure Blogger knows about your custom domain so that Google can direct readers to your blog. To get started, click on the Settings | Publishing tab in Blogger.
 Then click the link that allows you to switch to a custom domain.
 The BlogSpot Address setting now changes to Your Domain. Write in your new URL (www.example.com), and save your settings. If you do not enter the "www," you will receive an error message.
 Congratulations, you’re all set!
Subscribe to:
Posts (Atom)